

At this point I hope you are aware of the importance of not using the same password on all your accounts. Equally important is not using the same email address for all of your online accounts. If your account name and password are compromised, bad actors will try the same username/email and password on many other websites, in hopes you used the same across multiple sites. But who wants to have multiple if not hundreds of different email accounts to maintain? It would be a nightmare to manage. This is where email masks or alias emails come in handy. When you combine Duck Duck Go’s email mask with the Bitwarden password manager you can create unlimited email alias from the Bitwarden app and make that entire process semi-automated.
Duck Duck Go browser extension
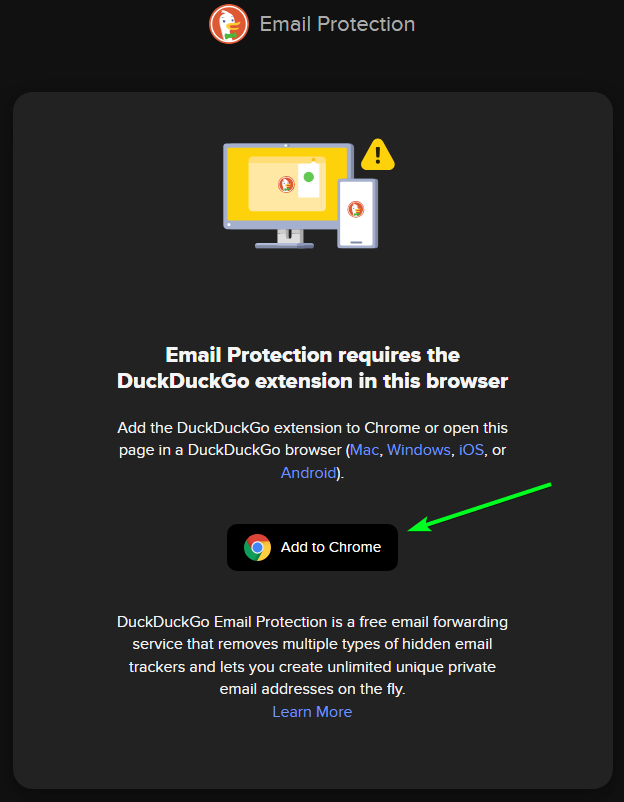
If you are not familiar with Bitwarden manager, you should read this article first. https://notposted.com/bitwarden-password-manager/. From here I will assume you already have a working Bitwarden client in your browser of choice. You will need to temporarily install the Duck Duck Go browser extension to set up the email protection by opening this link and clicking on add to your browser https://duckduckgo.com/email/ and then add again from the extension store. After we are done with all the steps, I will remind you to remove the extension after you no longer need it. You can of course keep it, but it will default your searches to Duck Duck Go, which is not really a bad thing unless you want more options.
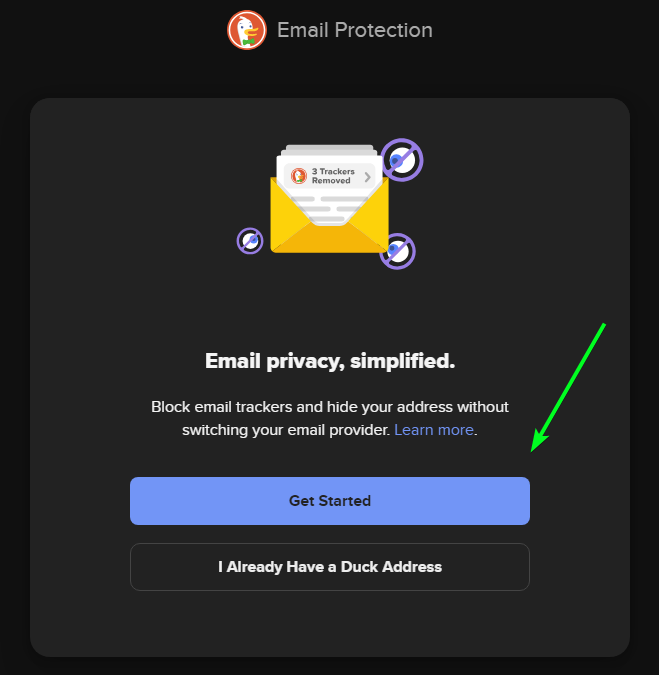
Let’s go back to the initial tab where Duck Duck Go email protection is. If you already have a Duck address you can click on that link and go from there. For those new to Duck you will click on the Get Started button and then the next button.
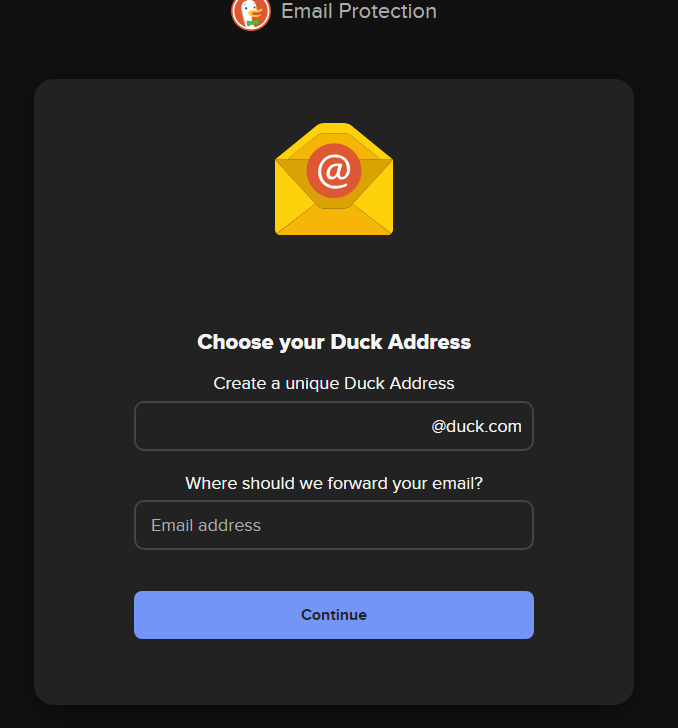
You will then be shown the Privacy Policy and Terms of use. Click Next again. Now you will want to choose and enter a unique Duck Address. This can be whatever you like and will be your main Duck address from which alias are forwarded to. Once you enter that you will have to enter an email address that you want all of these forwarded to. This is your personal email that you want to remain hidden. You will be prompted to ensure what you entered is correct.
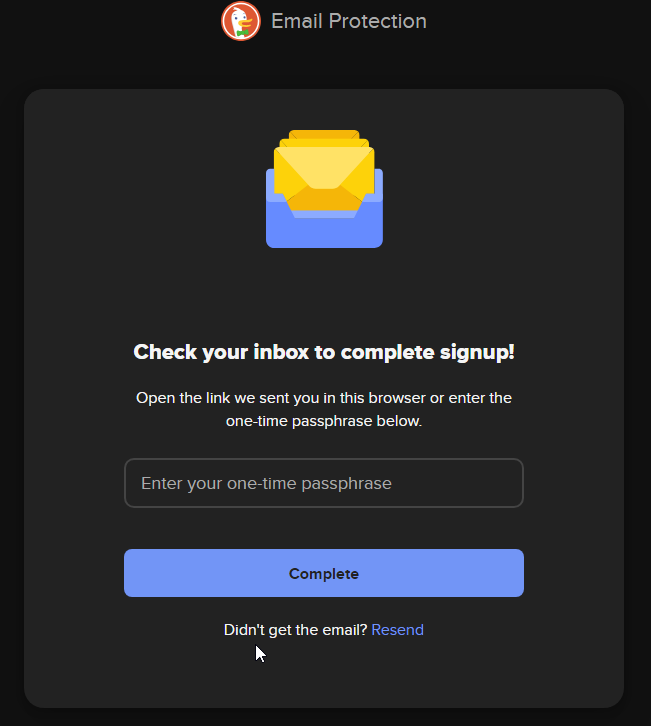
You will then have to check your main personal email address for a one-time passphrase that you must enter.
Once you have completed all the steps you should arrive at a screen that looks similar to this:
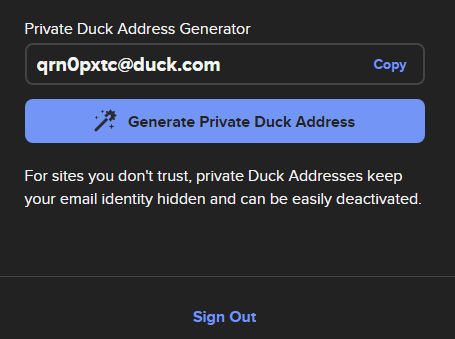
Getting the Duck API key
This next part may look daunting, but I promise it is not as bad as it looks. From the page above you can do one of 2 things. You can hit the F12 key or you can right click anywhere on the page and then left click Inspect. Both of these will split your browser view so you can see the code behind the website. In this new panel on the right, on the top row, look for the word Network and click on it. Now on the left side click on the blue button that says “Generate Private Duck Address”. This will populate the right side with information. You will click on adresses and to the right of that scroll down until you see the word Authorization: and Bearer to the right of that with some long numbers and letters. This is the API Key that you need to copy. Everything to the right of the word Bearer.
DO NOT SHARE THIS KEY WITH ANYONE. WE WILL ADD IT TO A SECURE NOTE IN BITWARDEN.

Add the API Key to Bitwarden secure note
This API key does not sync across your devices in Bitwarden. For that reason, if you wish to use it on another device you will want to save it as a Secure Note, which will sync to your other devices. You will then have the set up each device the same as what follows in the next section. But first let’s add the secure note. Open Bitwarden and click on the plus sign (add item) and in the type drop down select Secure Note. Give it a name that you will remember what it is and paste the api key in the NOTES section and Save It will now be saved across all devices once they are synced.
Set up Bitwarden with the API key
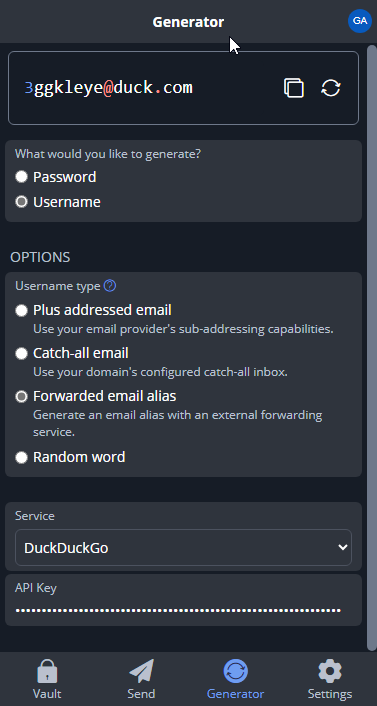
Open Bitwarden and click on Generator at the bottom and choose username, Forwarded email alias, DuckDuckGo under Service and add the API key. Click on the regenerate username button at the top and make sure it generates one.
Final Thoughts
You can now start generating email alias as your username and email for accounts that you create in Bitwarden and of course the password. There are other services this works with, but Duck has no limit, and it is free. Email alias are a great way to keep your email hidden. You can always block any alias you have set up if you start getting spammed on it. And as promised, here is your reminder to remove the Duck Duck Go browser extension if you desire.
One last reminder. Do not forget that if you want to create these email alias from another device like your phone, then you will have to repeat the steps in the section titled “Set up Bitwarden with the API key” on that device.
Find more on https://notposted.com

No Comments on "Hide your email and improve the security of your accounts"