
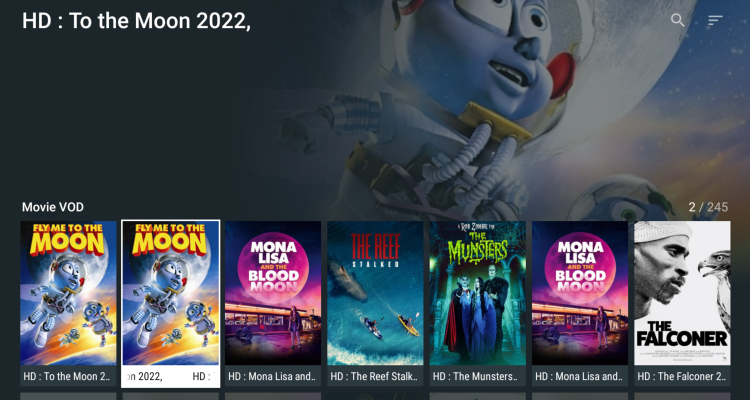

If you have ever used a VOD from an IPTV provider that did not have images, then this might be the answer for you. This is a guide on how to modify your m3u VOD list to add poster images for Movies/TV Series, in your IPTV players, such as TiViMate and MyIPTV Player, with a python script. It will change your player from this:

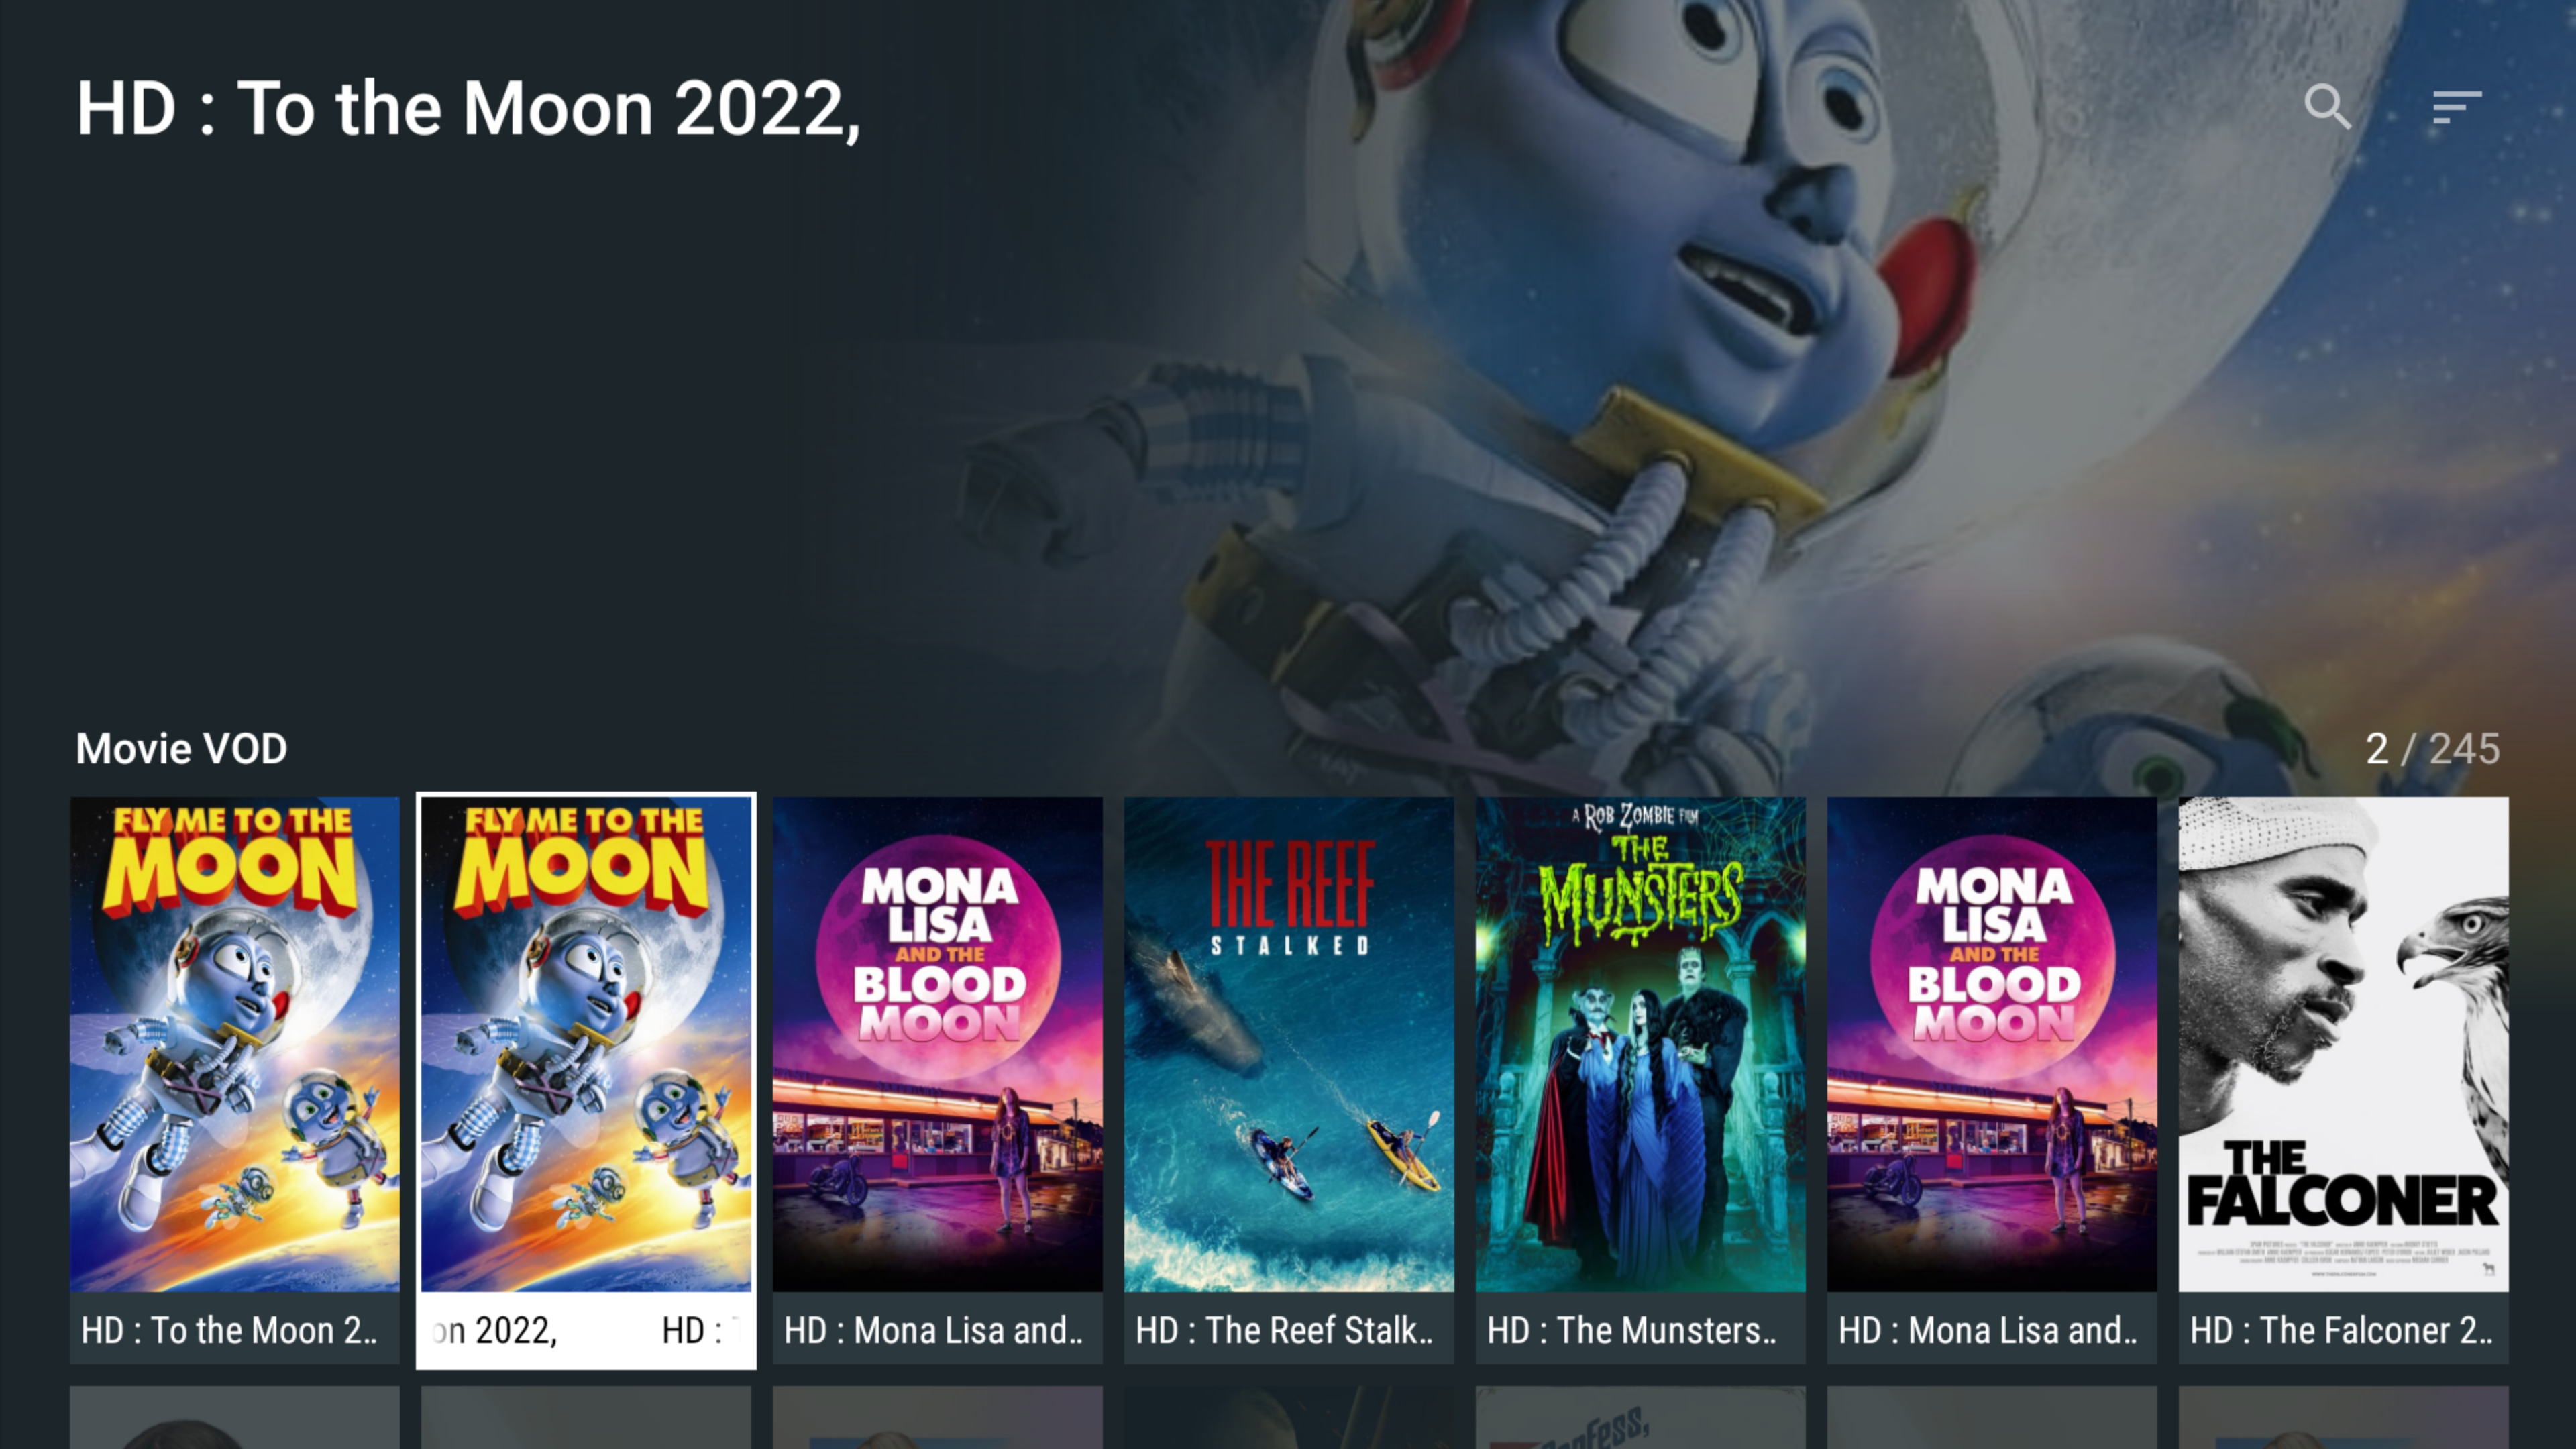
And transform it into this:
What is happening?
The python script uses your IPTV provided m3u for VOD to search TMDB for the poster of the movie and tv shows via API calls. It then uses the info from the original m3u and rebuilds the m3u file, adding the images URL from TMDB. You then host your file on something like Google Drive and add that link to your IPTV player channel list or you can simply keep the file on local or network storage.
What you will need
- The python script (the link will be posted below).
- Create a TMDB account so you can have your own api key.
- Some place to host a link to your finished m3u or it can be used on local machine or network share.
- A device to run script on (your desktop, server, raspberry pi, laptop)
Let’s start
TMDB
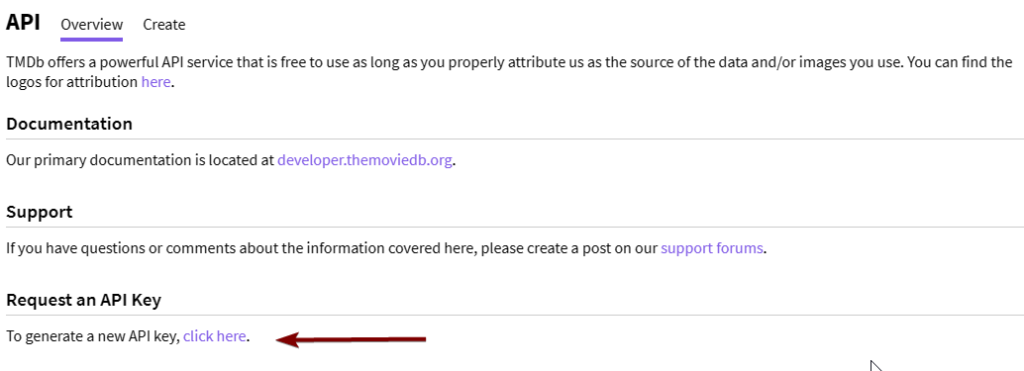
Create an account on TMDB and once logged in, go to your settings and then api section. This is where you will snag your API Key (v3 auth) to add to your script.
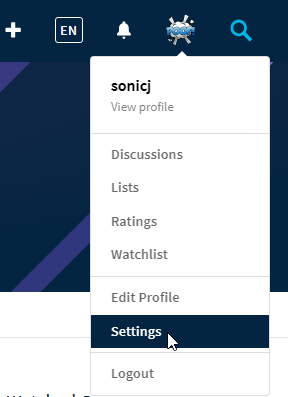
First create an account at Sign Up — The Movie Database (TMDB) (themoviedb.org). You will need to use an email you can access as you need to verify your account. Once you receive the email from TMDB, verify your email account and log in with the password you created in the first step. Once logged in you will see your account profile and settings on the top right. Click on this and then settings.
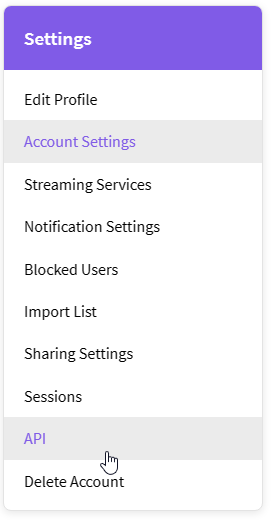
Click on API on the left menu
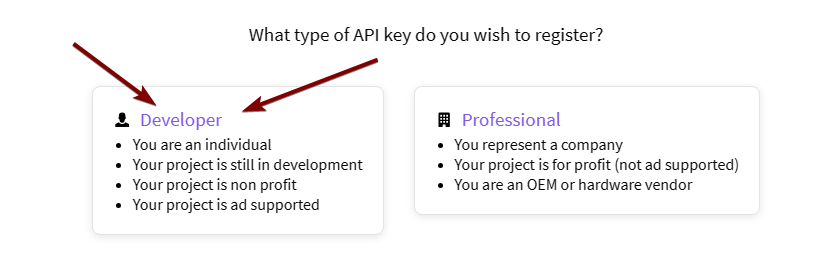
Generate an API key
Choose Developer
Scroll down and accept
Just make up a name and for the URL you can just enter none, but all of the other fields you will need to fill out. You could use fake names if you want, but I would use a legit email in case they needed to email you about anything.

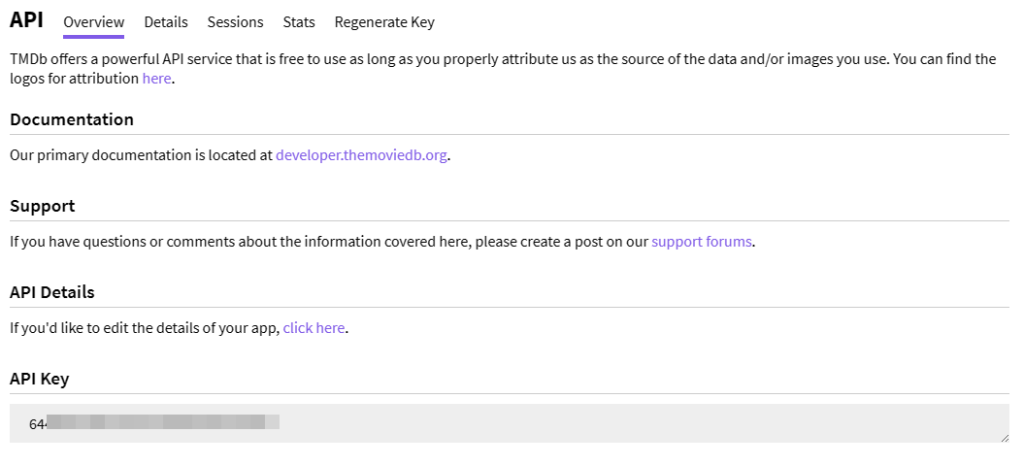
Now when you click on the API link in the menu you will see your API Key. Copy this for use later.
For Python installs
If you do not have python installed, you need to do that now. Most Linux distros have it. You can simply type the following and it will return the version. If you do not have it installed then you will need to install it. Just search for install python “insert your flavor of linux”. Windows will most likely not have it installed but you can search how to install for it as well. There are tons of guides on these. If you get stuck message me.
python -V
or
python3 -V
If you are using Linux you need to download the Linux version and if Windows the Windows version. The great thing about python is that it mostly does not care what the host is. but there are some slight differences between the two. Here are the links:
Downloads

Python script that allows user to scrape poster images from TMDB via API to add to an m3u file for VOD.
Python script that allows user to scrape poster images from TMDB via API to add to an m3u file for VOD.
New Standalone windows application. (See details towards the bottom)
VOD Image Scraper is a windows program written in python that allows a user to leverage a TMDB api to scrape poster images for adding to a VOD m3u playlist.
If you prefer to copy and paste or see what is in it first, you can find both here:
https://notposted.com/vod-image-python-script-windows-and-linux-versions/
Add required library versions
The Windows and Linux scripts are written with the following library versions:
tmdbv3api 1.9.0 (THIS IS NO LONGER REQUIRED IN THE LATEST SCRIPT – I am leaving it in place for those that still use the older version)
ipytv 0.2.4
ANY OTHER VERSIONS OF THESE LIBRARIES ARE NOT SUPPORTED!
To install these libraries in Linux enter the following at the cmd line:
Linux
sudo pip install tmdbv3api
sudo pip install m3u-ipytv
Windows
py -m pip install tmdbv3api
py -m pip install m3u-ipytv
If you already have an older version installed, then you can upgrade by adding -U at the end of the lines above.
Google Drive on Linux
Now on to the google drive. Since I am using google drive, I wanted to spend a little more time on Linux as it requires some more steps before working properly. For this I had to share the google drive folder on my pc to the network. Right click the google drive folder, permissions, sharing tab, share with Everyone user with write permission. Keep in mind that if you use your pc and it is offline, then it cannot write to that folder. See the next section, on how to get a downloadable link for the m3u file that you saved to your google drive.
If you plan to use google drive, then you need to mount it if you have not done so already. This is for the file path in the script. It would be something like
/mnt/google/
Follow these steps to set up the auto mapping of this network share
//servername/sharename /media/windowsshare cifs username=msusername,password=mspassword,iocharset=utf8 0 0
This is not a good idea however: /etc/fstab is readable by everyone and so is your Windows password in it. The way around this is to use a credentials file. This is a file that contains just the username and password.
Using a text editor, create a file for your remote servers logon credential:
nano ~/.smbcredentials
Enter your Windows username and password in the file:
username=msusername
password=mspassword
Save the file, exit the editor.
Change the permissions of the file to prevent unwanted access to your credentials:
chmod 600 ~/.smbcredentials
Then edit your /etc/fstab file (with root privileges) to add this line (replacing the insecure line in the example above, if you added it):
//servername/sharename /media/windowsshare cifs credentials=/home/linuxsername/.smbcredentials,iocharset=utf8 0 0
Save the file, exit the editor.
Finally, test the fstab entry by issuing:
sudo mount -a
If there are no errors, you should test how it works after a reboot. Your remote share should mount automatically.
How to create downloadable link from google drive
This assumes you already have a google account. If not, you will need to get one first. Go to https://drive.google.com, find the m3u that you saved there, right click and get link, set access to anyone with link, copy link. This link is a sharable link that a person would enter in their browser and have to click on download to get the file. For our purposes we want it to be downloadable for our player. To convert the link, take the original that will look something like this
https://drive.google.com/file/d/1K8TwI968WXXXXXYYYYYP72qbbx5F3qAekuBw/view?usp=sharing
Copy everything after d/ all the way to /view and paste it in between id=……….&export, like the line below
https://drive.google.com/u/0/uc?id=1K8TwI968WXXXXXYYYYYP72qbbx5F3qAekuBw&export=download
This newly created link is what you will add to your player in the channels playlist section.
Tiny CC
I then take that link above, from Google Drive, and I add create a small URL at http://tiny.cc/, because I am not typing all of that into TiviMate with a remote control. Nope.
Setup Linux
I logged in with the user I wanted to run the python script. I created a directory in the home directory and placed the script there.
sudo mkdir python
Make sure python is installed if you have not already. Make sure you have installed both m3u-ipytv and tmdbv3api (NO LONGER REQUIRED WITH THE LATEST VERSION). You want to make sure the file is ready for a schedule. First, in the python folder you created make sure it is executable by running:
sudo chmod +x VODimageLinux.py
When running the script for the first time in Linux, you will need to type in the following in your terminal:
sudo python3 VODimageLinux.py --setup
This will create the config file “VODimage.conf” in the same directory that your script is in and print an example of the config file to your terminal that will look like the following :
nano VODimage.conf
Set it up to run on a schedule
Now let’s check if you have crontab installed
sudo crontab -l
and if not then
sudo apt-get install crontab
Now let’s add a cronjob
sudo crontab -e
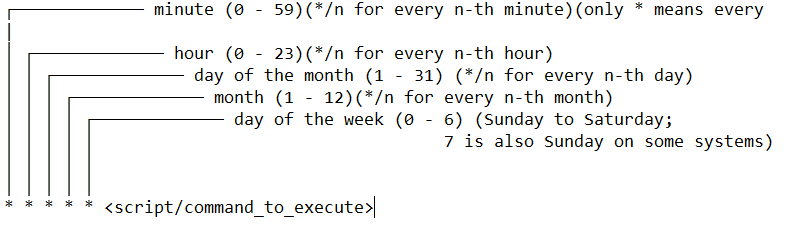
At the bottom of this file add something similar to this
* */6 * * * /home/yourusername/python/VODimageLinux.py
With the above settings it will run every 6 hours. Here is a chart that you can see how to configure it how you like
Windows
First time running the script on windows you will need to run the following:
py VODimageWin.py –setup
The rest of the steps would be similar to the python version above.
Scheduling in the task scheduler is pretty straight forward so I will just post a link to a guide on how to schedule it for those that don’t. If you need help after reading this reach out to me.
Player
In your player you only need to add the link or the path (if local network) to the playlist section. There is no need for an EPG. As a matter of fact in TiviMate you will select VOD. If you have a VOD m3u that has both TV Series and Movies, then they will show up together and in their own sections.
Windows VOD Image Scraper application (New)
I had several users who had a hard time working with the script so I decided to make a standalone application for windows in hopes that it would make the process easier for them. This is the same script, only modified to have a GUI (graphical user interface) and have all the requirements built into the installation.
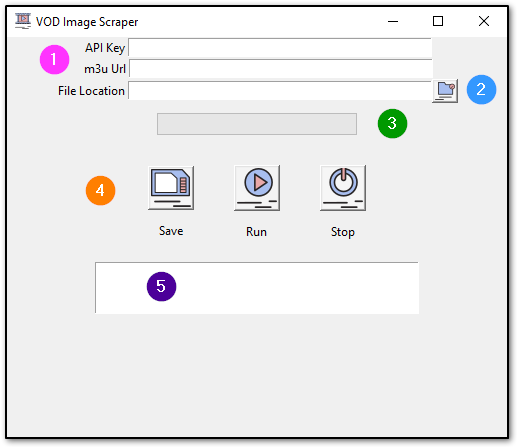
- In section one you will add your API key you created earlier, your m3u url and the location you want to save the file to.
- You can also click on the browse button to choose the location to save the finished m3u file.
- This is a progress bar that indicates how far along the progress is in creating your new file.
- After entering the info in section 1 above, you will want to click on the save button. This allows your info to be saved and loaded each time you run the software. After saving you can click the run button to begin the creation of the new m3u file. If for some reason you want to stop the process, you can click on the stop button.
- Any error or warning messages will appear here. If you have issues you will want to share this with me to take a look at.
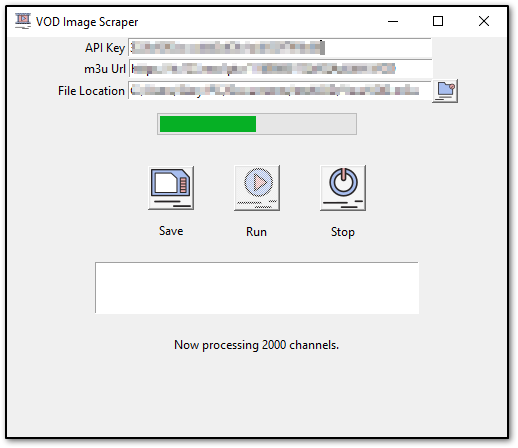
Here is an image of the application running.
This application is not signed and not known, so most likely your browser will throw up messages about are you sure you want to trust, etc. Your antivirus may do the same. In which case you will have to allow or add an exclusion if you want to use the app. Sorry but I see no need to purchase the certificate since I am giving this away. 🙂 Feel free to comment below if you have questions or issues.
VOD Image Scraper is a windows program written in python that allows a user to leverage a TMDB api to scrape poster images for adding to a VOD m3u playlist.
App Images by rawpixel.com on Freepik
Final thoughts
This came from my own disappointment in not having the images. It is a real pain to read the names of each. I do not always get a full “Picture” of what the movie is about, without a picture (pun intended). I am not a developer, as any real developer will see if they look at this code. I am very open to fixes and suggestions by someone that knows what they are doing. I have enough knowledge to be dangerous. I had java and c++ classes in college and mess around with it for projects like these but never enough to be any good at it.
A big thanks and shout out to colinjmatt. He made some modifications to the code that added the logging to screen and file, allows use of a config file or arguments to enter the variables instead of modifying the script.
The script takes about 30 seconds to complete on a total of 500 shows and 2 minutes and 30 seconds on an m3u of 2000 shows. This is including the time to rebuild the list. I have tested this on TiviMate and My IPTV Player and they both work great.
Hopefully this will you to be able to add poster images for Movies/TV Series in your m3u files.
Find more on https://notposted.com


is there a way to rewind or go forward ? all you can do is pause. and that sometimes doesnt work and the movie starts all over
I think this is dependent on the player app and or device you are playing it on. For example, when I use MyIPTV player on a windows computer there is no FF or RW functionality and I get the same results that you described. However, when I use an Nvidia Shield Pro or a Firestick and I pair that with the Premium version of TiviMate, I have FF, RW and Pause functionality that works perfectly.
So this works pretty well but I do have one issue. My VOD m3u file from my provider has 5,426 movies but when I run it through this script I come back with 1992 movies. Any ideas
Hi Alex. My guess is that the VOD m3u from your provider has some extra entries in the title section and when it searches TMDB it cannot find the correct movie. If you download your providers .m3u and open it with something like notepad ++ you might be able to see these entries. If there are repetitive ones, you could modify the script to remove those parts that are not part of the title. For example, the one I worked with was formated like “HD : StarWars ” in all of the entries as part of the title name, so I filtered that out with the script. Look in the section called “# if Movie filter title”. There is one for tv shows as well. In this section you would add 2 more lines for each entry, so the next would be t3 = and next line title3 =. Just follow what I have already done. Then when you have your last titlex replace what is in the parenthesis of the line below those that says search = movieobj.search(). Another possibility is there is no poster id for it. Let me know if you have any more questions.
Script is broken for TV shows. Only movies work 🙁
Hey James. Thanks for the heads up. There was an issue with how the script was handling blank spaces and I have modified it to address that. You can download the script again or if you copied it from the page, you could do that again as well. Please let me know if you have any more issues with this new version.
You’re awesome thank you! I’ll report back shortly
Works for Movies but still broken for TV shows
I downloaded the Linux and Windows versions, and both tested to work fine. Did you modify the variables section after downloading for the items like file path, etc? If you open the .m3u where the script saves it, does it have links to the TMDB url under the tv shows?
(On February 9, 2023) I have updated the script to address some missing movies/tv shows not being added to the final .m3u.
Any way to have this output each movie as an strm file to be used with Emby for example?
I can look into it if I get some free time, but this script should work fine for Emby as well. I know it does in Jellyfin and Plex. I have not tested in Emby.
I get this error after it processes a few hundred: Failed to establish a new connection: [Errno 24] Too many open files
Can you tell me if you are using the linux script, windows script or the application? How many times have you tried it? Does it mention that this is your connection to api.themoviedb.org? If so, this may be a temporary issue on their side.
It’s the linux script running on my NAS. It correctly does over 1000. I’ve tried it four times. Here’s what the full error looks like (repeated over and over):
Processing VOD 2065 of 41388
Title: [Redacted]
Search term for TMDB: [Redacted]
An unexpected error occurred: HTTPSConnectionPool(host=’api.themoviedb.org’, port=443): Max retries exceeded with url: /3/search/movie?api_key=[REDACTED]&query=Faceless%20After%20Dark%20%20%5B1080p%5D%20%5BBluRay%5D&page=1&language=en (Caused by NewConnectionError(‘: Failed to establish a new connection: [Errno 24] Too many open files’))
Thanks for the info Sam. I was able to reproduce it on mine as well. I have made some modifications to the scripts to fix this issue. It will be slightly slower than the previous one. You can download the new Linux version here: https://notposted.com/?sdm_process_download=1&download_id=1913 or just scroll up and download from the link. I also updated the printed version for all to see what has changed. I hope this fixes your issue. I will say that the over 40,000 items you have to process is a lot. I imagine it would take some time to run. The sample I use for testing is 2,000.