
Before we begin
This is a guide on how to make your own digital picture frame. I made mine for less than $28, not including the software, and here is how I did it. To keep the price down you will want to keep an eye on Amazon or more importantly Woot to snag an older model and super discounted fire tablet. I got my 7-inch tablet that I am using in this how-to, for $15 on Woot. You may also already have an older tablet laying around that you need to find a new use for.
Supply list
- Tablet
- Picture Frame
- Hot glue gun
- 1/2-inch-thick by 3/4-inch-wide wood strips
- 1/4-inch-thick by 1 1/2-inch-wide wood strips
- Screwdriver
- Putty Knife
Please keep in mind that depending on the size of your tablet you may need to adjust these materials.
Let’s Begin
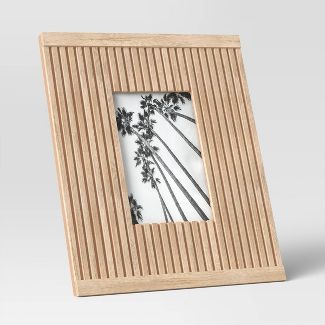
You will need to find a picture frame that suits your needs. There are 2 important parts to this. One, the hole for the photo needs to be the right size to allow your screen to fit. Two, your frame needs to have enough space on it to allow you to build the case for the tablet on the back. For this guide, I purchased this frame from Target 4×6 PhotoFrame.
Frame for tablet
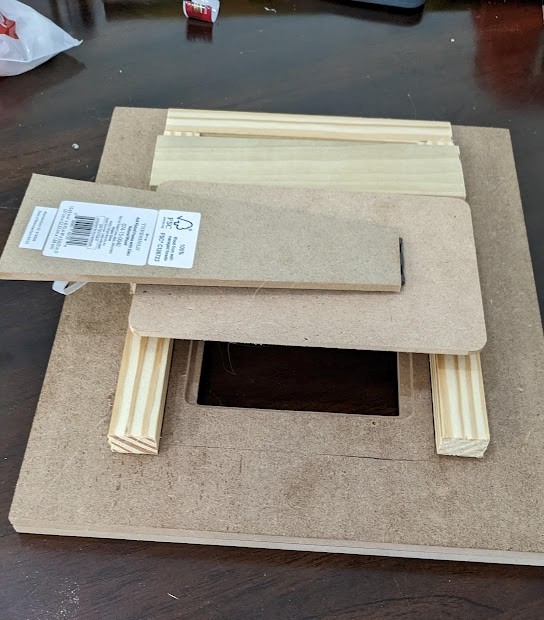
You will be turning it to landscape and the hinge-stand on the back is only designed to work in portrait, so you will have to make some adjustments later. The first thing you do is turn it over and remove the back and hinge, as well as the 4 screws and locks for the back. Remove the glass as well. The screw holes will leave a little rise from the screws, so take a putty knife and scrape it flat.
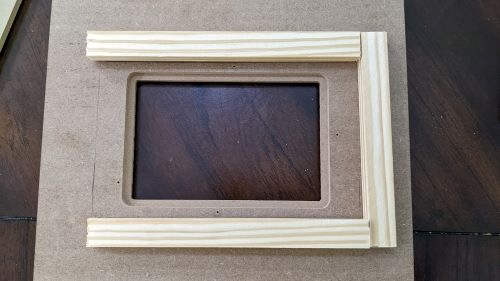
Place the tablet to the back of the frame, with it facing forward, to get an idea of about where you want the tablet positioned in the frame. Take a pencil and outline the tablet to get a basic idea of where the frame should be. Measure the length of the tablet and make your first cut of the 1/2 x 3/4 strips, cutting the bottom piece a little longer than the top, for when you need to slide it out. Now hot glue it in position along the lines you traced for the bottom. Let it dry for about 10 minutes. Now place the tablet back on top of this to make sure it is in the correct position in the hole of the frame. If it looks good, go ahead and cut a second strip for the top and hot glue it in place. While that is drying, measure from the top to the bottom of the 2 strips and cut another strip for the final side. (One side will remain open so you can remove the tablet whenever you want)
Back for tablet
For the back of the tablet frame, I only wanted to use strips so that it could get airflow. Also, as I mentioned earlier the hinged stand was only designed to work in portrait, so here I will re-work that so I can have the stand in landscape. I cut two strips of the 1/4 x 1 1/2, the same length I measure for the side strip. I then placed one of these strips toward the closed end like below.
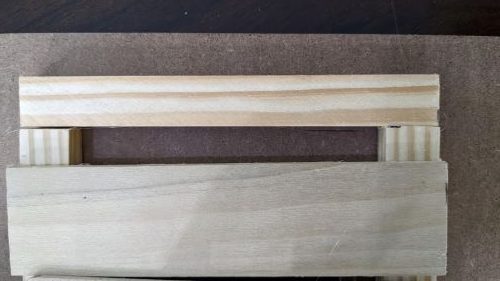
Now to address the hinge issue, I take the back plate and hinge and glue to the final back plate strip, just centering it. And now I glued that strip and hinge to approximately the center of the frame.
Software
There are many different apps you can find that you can use to make your own digital picture frame. After some research, I went with fotoo premium as it provided some really nice features, like adding a clock/weather, and a zoom in and out on faces. It has many nice transitions as well. You can find it on the Google Play store at fotoo on Google Play or on Amazon at fotoo on Amazon.
I have mine set to use images from a Google Photos folder and this folder is set to recognize certain family or friends faces and add them, so it continually updates itself.
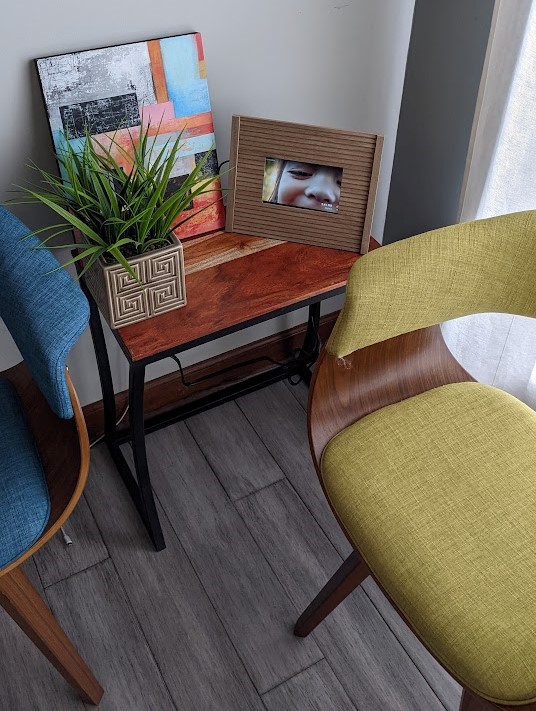
Final Results
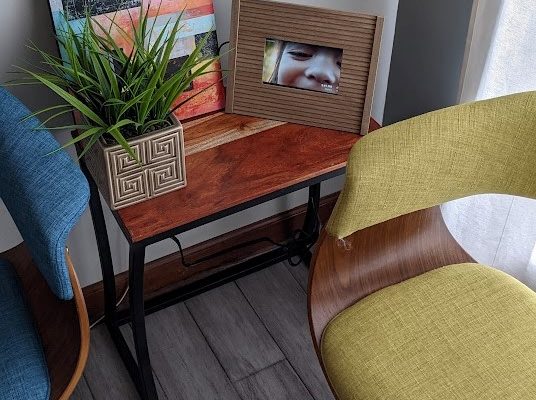
Finally, here is the end result of how to make your own digital picture frame.
And here is a video so you can see the software in action
Final Thoughts
The looks of the box I made for the frame is not going to win any awards, but my goal was to make it as cheaply as I could and, in my case, it will not be showing anyway. However, it could be stained, along with the frame to look a little better if someone wanted. I feel like it turned out nicely and I could not have purchased one that worked as well as this one for anywhere near the $28 it cost me.
Find more posts on Not Posted.
This is very informational! Thank you!