


Introduction
In a previous tutorial, I showed how to enrich an m3u VOD playlist with poster images by pulling artwork from TMDb (Add Poster Images for VOD). That worked well for giving your playlist a polished look, but it was a one-time process—you had to rebuild the file each time or add it to a cron job or task scheduler. More importantly there was no details other than the name and an image. That is all about to change. This new version will show you how to add images to IPTV VOD playlists along with all the details.
This new tool takes things further. Instead of re-running a script manually, it acts as a smart proxy that takes an m3u playlist and creates an Xtream Code playlist. M3U’s are limited in what they can display. Xtream Codes are able to handle more details.
-
Fetches and attaches posters automatically.
-
Refreshes your playlist at the interval you choose (
CACHE_TTL). -
Provides a health check endpoint so you can see it’s working.
-
Delivers an updated, image-rich playlist to apps like TiviMate or Televizo.
- Ratings, Genre, Year, Cast, Director, Plot overview.
In other words, you set it up once, point your player at it, and it keeps everything fresh without any extra steps.
Prerequisites
-
OS: Linux (native or Docker), Windows (Docker Desktop or WSL), macOS (Docker).
-
TMDb API key: free personal key.
-
Source URLs: Movie VOD URL + Series URL.
-
Port: a free TCP port (e.g., 9000).
-
(Optional) Reverse proxy domain (if you’ll access it outside your LAN).
Get TMDb API key
Create an account on TMDB and once logged in, go to your settings and then api section. This is where you will snag your API Key (v3 auth) to add to your script.
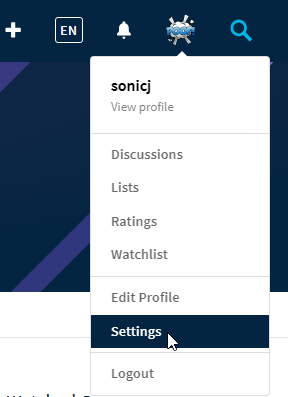
First create an account at Sign Up — The Movie Database (TMDB) (themoviedb.org). You will need to use an email you can access as you need to verify your account. Once you receive the email from TMDB, verify your email account and log in with the password you created in the first step. Once logged in you will see your account profile and settings on the top right. Click on this and then settings.
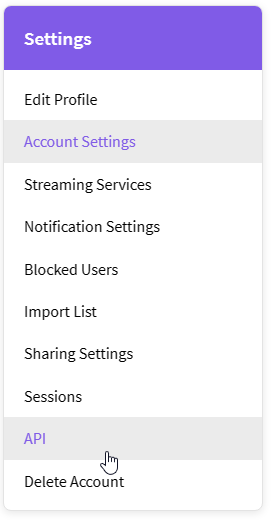
Click on API on the left menu
Generate an API key
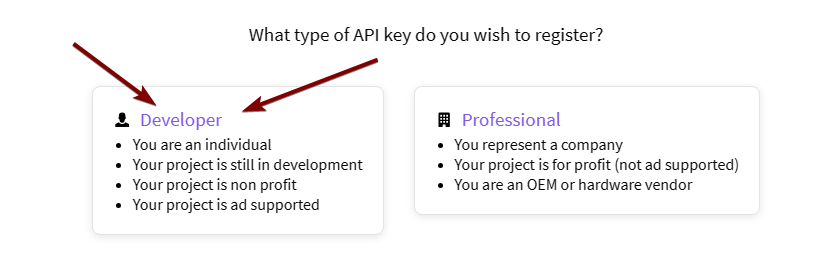
Choose Developer
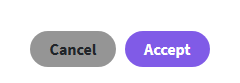
Scroll down and accept
Just make up a name and for the URL you can just enter none, but all of the other fields you will need to fill out. You could use fake names if you want, but I would use a legit email in case they needed to email you about anything.

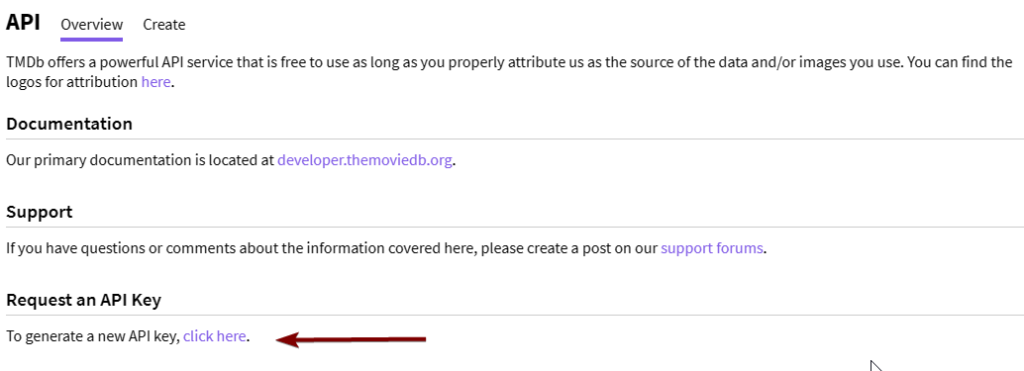
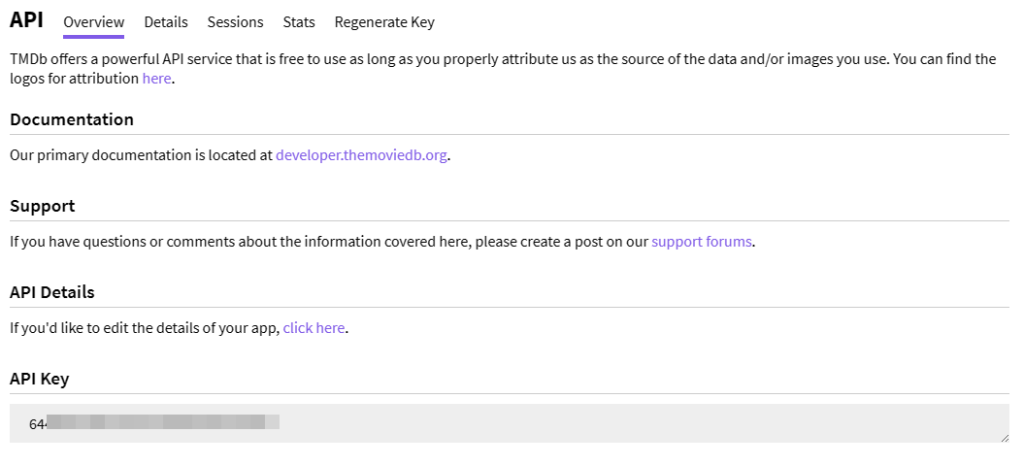
Now when you click on the API link in the menu you will see your API Key. Copy this for use later.
Let’s Start
Here is a download link for all the required files in a zip. They are already in the folder structure they need. You simply download it to the directory you want to place it or move it there before extracting. For example, if you want to add it at /opt/docker/ on linux you would move it there and run the following:
unzip xcproxy_project.zip
In windows you could right click and extract all to the folder you want.
This will give you those files in this structure:
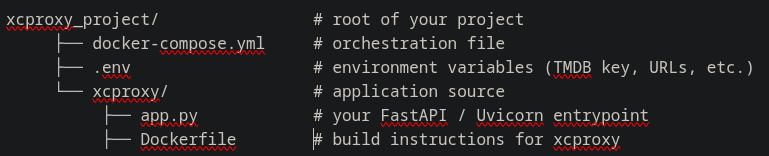
We only need to modify one file to add your specific values. Change directories to xcproxy_project
cd xcproxy_project
Open the .env file to modify it
nano .env
Here you will need to change username in XC_USER=username to a username you choose. This is the username you will enter in TiviMate to connect. Do the same for XC_PASS.
Next you change the MOVIE_M3U_URL and the SERIES_M3U_URL to those provided by your provider.
The last thing you have to change here is the TMDB_API_KEY to the one you created earlier on TMDb.
You can change the others but it is not required.
.env Explained in more detail
-
- POSTER_PREFERENCE: Choice between getting the poster from TMDb or m3u (if you have it already)
- TMDB_ON_LIST: false is best to reduce API calls, but true shows posters even in categories
- XC_ENRICH_DETAILS: Extra details like actors, ratings, etc can be turned off or on
- CACHE_TTL: Controls how often you re-fetch and re-enrich. Low TTL on big libraries = lots of TMDb calls = higher chance of rate limits → posters fail sporadically. Raising TTL reuses cached metadata longer, slashing TMDb calls and reducing “missing poster” bursts.
- STREAM_MODE: Redirect returns providers url and players pulls direct from provider. If facing externally this could be discovered. Proxy provides a xcproxy url that fetches from the provider and then relays it. Proxy will require more CPU/Bandwidth on your host.
- SERIES_GROUPING: “smart” groups by season/poster; “flat” exposes all episodes individually.
- CATEGORY_PICK_FIRST: Choose genre to add them as categories or default to have no catgories
- DEDUPE: True to show only one of each movie show based on preferences below or False to keep all versions
- PREF_QUALITY: put in order of your preference. It will choose the one that is highest in order that is available
- PREF_SOURCE: Choose order of preference for the source.
- TMDB_ON_LIST: False is cache only and true is fetch it if it is missing. I suggest on the first run to set both sections of this to True. It will be heavier on the api calls to TMDb but will do a better job of getting all posters and categories. After it is looking good, then set it back to false so it uses cache and periodically will update those missing.
Example of .env:
# --- Xtream Codes login (used inside TiviMate) ---
XC_USER=username # you create this and enter in Xtreme Code
XC_PASS=password # you create this and enter in Xtreme Code

# --- Your IPTV provider M3U playlist URLs ---
MOVIE_M3U_URL="https://url_to_movie_provider/MoviesVOD"
SERIES_M3U_URL="https://url_to_series_provider/SeriesVOD"

# --- TMDb (for posters/plots) ---
TMDB_API_KEY="enter_your_tmdb_api_key"
POSTER_PREFERENCE=tmdb # tmdb | m3u (Only an option if your m3u has images)
TMDB_ON_LIST=false # reduces timeouts & load
XC_ENRICH_DETAILS=1 # 1 is details on, 0 is details off

# --- Behavior ---
CACHE_TTL=14400 # refresh every 14400s (4 hours)
STREAM_MODE=redirect # redirect (default) | proxy
SERIES_GROUPING=smart # smart | flat
HOST_IP=127.0.0.1 # used only for /get.php links

# --- Metadata cache file inside container ---
META_CACHE_FILE=/cache/tmdb_cache.json

# --- Categories in TiviMate (TMDb-driven) ---
CATEGORY_MODE=default # default(no categories) | genre (adds categories based on genre like Action, Comedy, etc.)
CATEGORY_PICK_FIRST=true # if a title has multiple TMDb genres, pick the alphabetical first

# --- De-duplication (one variant per title/episode) ---
DEDUPE=false # true=keep one; false=keep all
PREF_QUALITY=2160p,1080p,720p,480p
PREF_SOURCE=remux,bluray,web,webrip,other # You can also optionally append: ,dvd,ts,tc,cam

# If you want category building to fetch missing TMDb on list responses:
TMDB_ON_LIST=false # false=use cache only; true=fetch if missing (heavier)
Once you have modified the .env file you are ready to run it. From the same directory where docker-compose.yml resides, run the following and it will build and start it.
docker compose up -d --build xcproxy
Here are some commands you can run post starting to make sure everything looks good:
For Health (if running from another machine enter the local ip instead of localhost, i.e. http://10.0.0.25:9000)
curl -s http://localhost:9000/health
Status (up,down,restarting)
docker ps --filter "name=xcproxy"
Logs (ctrl + c to exit)
docker logs -f xcproxy
Bring xcproxy down
docker compose down
Set up in TiviMate
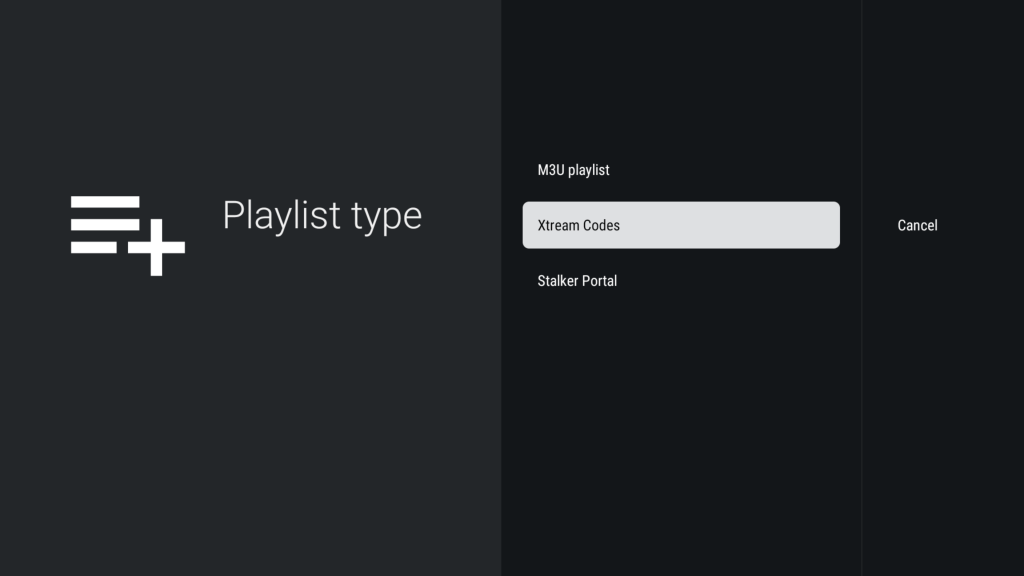
You are now ready to add it in TiviMate or any other application that accepts Xtreme Code playlists. (I have tested in TiviMate and Televizo successfully as of this writing. I started to try out OTT Navigator but got distracted.) I will demo in TiviMate but they should all be similar. Go to your settings in the app and look for add playlist > Xtream Code Playlist
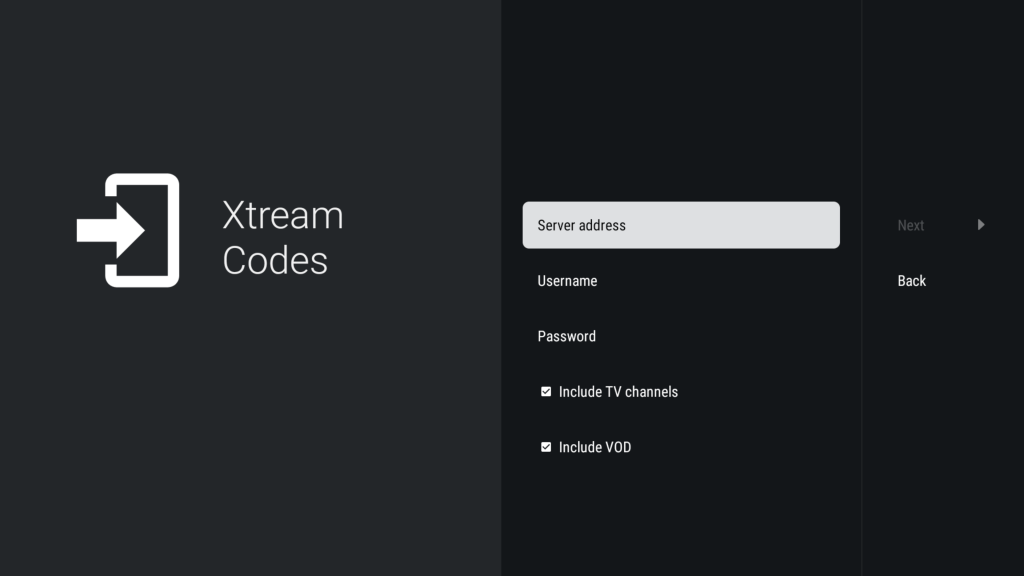
Enter in your server, username and password. The server needs to be the local ip for the host it is running on along with the port. For example, http://10.0.0.25:9000. The username and password you enter what you created in the .env file earlier. It will spin for a bit as it processes it. This will likely take longer the first time. After that it will cache what it can so it will be faster.
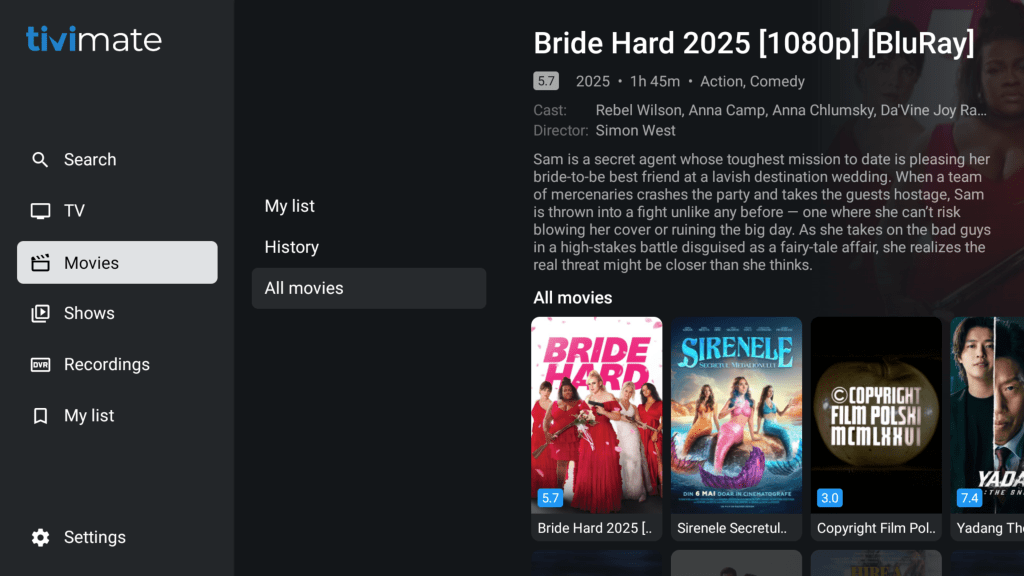
Once it finishes you can back out and you should see Movies and Shows on the left side.
Final thoughts
I am very excited with how this turned out and I am hopeful it will be useful to add images to IPTV VOD along with all the details. If there is interest I may continue on with more development for it. One thing I was considering is adding an option to use other rating sources like https://simkl.com/ (my favorite) or maybe IMDB or Rotten Tomato. Just thinking out loud.
There are a few things I want to mention again. For starters, do not forward your port unless you use something like https://nginx.org/. I have a docker compose of this set up and plan to do a write up on configuring and using this. Honestly, unless you plan to use it outside your network, you really do not need to port forward at all.
Also do not set your CACHE_TTL too low. Be respectful of your provider and TMDb. The more often you hit these the more resources it takes for you and for them. We don’t want to ruin a good service.
Please let me know how you like it in the comments or if you have questions feel free to ask. I will do my best to get back with you.
Find more on https://notposted.com
")

Hello I am running into an issue with the Xtreme code not loading it gets stuck on processing, server is up and I see API requests from TMDB, when the docker container loads it displays all the movies and episodes loaded from URL in the logs, but in the player its not populating, some tips would be great
Without seeing the log output, my guess is you might be running a large list of VOD. In your .env try changing the following:
TMDB_ON_LIST=true
DEDUPE=true
This will help force it. But if it is a large list it might take a few times of running it to populate it until it is cached then it should be quicker. I saw you joined on Discord so I will try to respond there.