

I have been working with docker containers lately and was inspired to make a docker-compose file that would hopefully make it a much easier process to have a completely automated system for obtaining and playing media files on a home server all the while running through a vpn. I did not create any of these containers, I just compiled them together in one docker compose file. If you follow along on this tutorial on the all-in-one media docker container, you will have the following applications up and running in minutes (you will need more time to configure them).
- Plex Media Server (requires Plex Pass for full functionality)
- VPN (OpenVPN client, you will need a vpn that provides the config files)
- qBittorrent (torrent client)
- Ombi (Allows you and your Plex users to request content by themselves)
- Radarr (Movie collection manager)
- Sonarr (TV series collection manager)
- Jackett (proxy server that translates queries from other apps and returns results on searches)
- Lidarr (music collection manager)
- Readarr (e-book collection manager)
- Tautulli (Plex statistics monitor)
- xTeve (EPG simulated tuner for Plex)
- Threadfin (Tuner for Plex, Emby and Jellyfin)
- Jellyfin (free alternative to Plex)
- FlareSolverr (completes captcha for CloudFlare)
- Navidrome (personal music streaming service)
What you will need
- A device to run it on. This can be a server, desktop, raspberry pi, VM, etc. Anything that can run docker. I recommend it to be something that can just run all the time. For this tutorial I used a Raspberry Pi 4 with Ubuntu Server 20.04.5 LTS for the OS without the GUI.
- A VPN service that works with OpenVPN. (FastestVPN is an example, and this link provides you a promotional offer that is exceptional in price and I personally use this.)
- A storage location where you will place your torrents, if they will not be on this same device. I am using a NAS.
- Plex Pass if you want full functionality from Plex.
- PuTTY or similar tool, unless you plan to have a monitor, mouse and keyboard connected to your device.
- I highly recommend that you read this entire article through once, before you start your work. It helps to get an overall picture in your head before you begin the actual work.
I will be starting from the point of the OS already being installed on your device, connected to your network and NAS or other storage connected to the network, ready as well. If you do not have that ready yet you will need to get to that point before you proceed to the next section. I will be using one user to run each of these containers, and it will need sudo.
Overview of these applications
I thought I should give a short overview of how these applications work together. Once configured most of these just work in the background and you will not be logging into them on a daily basis. Plex will of course be where you watch or listen to your media. Ombi is the interface where you or your plex users, will request Movies, TV Shows or Music. You can set users up to be auto approved or require your approval for the download. Once the request is approved, if it is a movie then Radarr takes over and if it is a TV Show then Sonarr takes over and Lidarr for music. Each of these are configured to connect to your source of torrents using Jackett, it sets the quality, size and type of files you want and sets your torrent client. The request is downloaded via qBittorrent. Ombi notifies you via email when it is complete and ready for viewing on your Plex media server.
xTeve is a simulated tuner for Plex so that you can use an IP TV solution in Plex and have a guide for live tv viewing. Threadfin is a fork of xTeve. Readarr is for books and can be used stand alone. Tautulli is for stats on Plex and is also stand alone. Jellyfin is a free alternative to Plex as a media server. Navidrome is a personal streaming service for your music. They can be played from a browser, a subsonic api app, a jukebox and you share songs/playlists with your friends to listen directly or even create accounts with access.
Mount your network share (updated)
PuTTY
Since I am not using a GUI desktop, then all the steps from here will be in the terminal or using PuTTY. To use PuTTY, you will need to have SSH server installed on your device (if you use the same OS it will already be installed) and PuTTY installed on your pc. You will need the Ip address of the device that we will be putting Docker on. If you do not have it, you can try opening your router interface in a browser and look for attached devices and find it that way, or you might have to connect a monitor, keyboard and mouse to the device. If you have to do that simply type in the following to find your Ip address, and it should be the first one there. Something like 10.0.0.2
hostname -I
Then type in that local internal Ip address of your device into PuTTY on your pc, with port 22, click open and a terminal will pop up for you to enter your username and then your password of your device you will be working on.
Mount share
Let’s go ahead and mount the network share. This is the location where you will store your media files. In my case I will have them on a NAS (network attached storage) and the path looks similar to this:
//10.0.0.9/public
First, we will need to install cifs-utils if you do not have it installed already. Simply type the following to do so.
sudo apt install cifs-utils
Now we will create the directory where the network share will be mounted. To do this type the following, but you can call it something different if you like.
sudo mkdir /media/windowsshare
We want to mount this, and have it mounted every time the server starts up. To do this we will want to modify the fstab. In the terminal type the following to open it.
sudo nano /etc/fstab
Arrow down to the bottom of the file and paste this in the fstab file (where the paths match your path, this is just an example). Then save by using CTRL + X on your keyboard and when prompted type the letter Y for yes and then hit enter and it will save it. This will mount your share to /media/windowsshare on start up, so that it is available to each of the applications we are adding. Your ip will most likely be different as well as the folder that follows. You can also mount it to any folder combination you like. I simply called mine windowsshare because that is what it is :).
This should work when sharing from a NAS:
//10.0.0.9/public /media/windowsshare cifs guest,uid=1000,iocharset=utf8 0 0
Save the file, exit the editor.
Update: For a shared folder on Windows that has password protected logins, try this:
Using a text editor, create a file for your remote server/desktop logon credential:
sudo nano ~/.smbcredentials
Enter your Windows username and password in the file:
username=username
password=password
Save the file, exit the editor.
Change the permissions of the file to prevent unwanted access to your credentials:
sudo chmod 600 ~/.smbcredentials
Then edit your /etc/fstab file (with root privileges) to add this line:
//10.0.0.9/public /media/windowsshare cifs credentials=/home/ubuntuusername/.smbcredentials,iocharset=utf8 0 0
Save the file, exit the editor.
Finishing up mount
After saving, you will want to type the following to mount it. You could just reboot, and it would mount, but this is immediate.
sudo mount -a
Let’s verify that it has mounted now by typing the following and pressing enter
df -h
You should now see it in the list. And you can even change directories to it if you like by using
cd /media/windowsshare
Install Docker and the Docker-Compose plugin
Set up the repository
sudo apt-get update
sudo apt-get install ca-certificates curl gnupg lsb-release
sudo mkdir -p /etc/apt/keyrings
curl -fsSL https://download.docker.com/linux/ubuntu/gpg | sudo gpg --dearmor -o /etc/apt/keyrings/docker.gpg
echo \
"deb [arch=$(dpkg --print-architecture) signed-by=/etc/apt/keyrings/docker.gpg] https://download.docker.com/linux/ubuntu \
$(lsb_release -cs) stable" | sudo tee /etc/apt/sources.list.d/docker.list > /dev/null
Install Docker Engine
sudo apt-get update
sudo apt-get install docker-ce docker-ce-cli containerd.io docker-compose-plugin
Time to verify the docker installation by running the following and if the installation was successful, it will print a message and exit.
sudo docker run hello-world
Mega Media Container
We are almost ready to create the containers! Just a couple more steps to prepare for it and I want to spend some time explaining it so you can decide how and if you want to modify it before running. We need to make a directory for this, and I chose to use /opt, but you can really put it anywhere you like. So, let’s create the directory where the docker-compose file will be stored and where some of the application volumes will be stored as well.
sudo mkdir -p /opt/docker/mega
Now change to that directory
cd /opt/docker/mega
Set up VPN
To prep for the VPN we will need to create one directory and 2 files to be place in that directory. Starting with the directory, it will be similar to what we just did.
sudo mkdir vpn
You will need to choose a config file from your vpn to the location you wish to connect to. These are UDP and have an extension name of .ovpn. Let’s put this file in the same location that we mounted earlier of /10.0.0.9/public (Again this is my example, yours will be different). Once the file is there, we will copy and change the extension by doing the following in your terminal (changing the names to fit yours, this is an example):
sudo cp /media/windowsshare/london.ovpn /opt/docker/mega/vpn/vpn.conf
Now let’s change to the vpn directory and then edit this file
cd /vpn
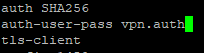
sudo nano vpn.conf
We need to scroll down to where it says auth-user-pass, go to the end of that line and hit space then type vpn.auth. Ctrl + X, then Y and enter to close
Now for the last item on the vpn, we need to create the vpn.auth file and add the username and the password (one per line) for your vpn service. To save again it is CTRL + X, Y and enter.
sudo nano vpn.auth

You should now see the following files in the vpn directory if you type “ls -la” (without the quotes) in your terminal.

Let’s back up a directory level by typing the following:
cd ..
Docker compose file
Download the file and unzip, then copy it from your share to your device. To copy it you will place the unzipped docker-compose.yml file directly at //10.0.0.9/public (this is from my example, but will be different for you) and type the following from your terminal
sudo cp /media/windowsshare/docker-compose.yml /opt/docker/mega/docker-compose.yml
Or if you do not like downloading files then you can go to this link, that will open in a new tab >>> Docker-Compose File, copy it. Then you can type the following into your terminal to start a new file
sudo nano /opt/docker/mega/docker-compose.yml
This will open a new blank file and just paste it into this. Type CTRL + X on your keyboard then Y when prompted and hit enter. You must be very careful not to get these line indentations off because it will affect if it works or not. Verify it is there by running this command. You should see the vpn folder and the docker-compose.yml file.
ls -la
Time Zone
You will want to change the time zone to where you live. In the docker-file, look in each application service for environments section and under it will be – TZ=America/New_York, just change this to yours. As an example if you live in the London time zone you would change this to – TZ=Europe/London.
I don’t want to use one or more of the apps
If you do not want to use one of the apps you can comment out the lines of that app by putting the number sign (#) at the beggining of the lines for each application/container, or you can simply remove that section completely by deleting it from the docker-compose file. I will show you an example below of commenting an app out. Unfortunately, yaml files do not have a way to comment out entire sections. Again, be careful with messing up the indentation as it can cause it to not work. A container starts with its name and goes until you see the name of the next container.
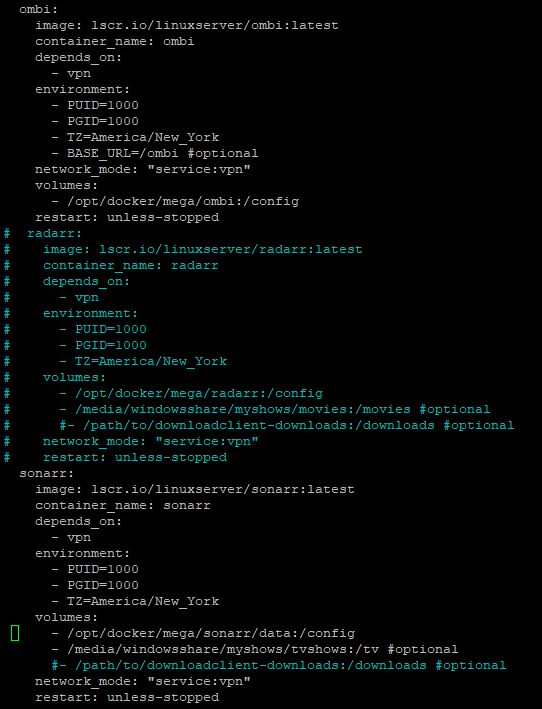
To add or remove from the VPN
In order for a container to run through the VPN there are 3 lines on each container added and the ports get moved to the VPN container. So, if you want to remove a container from the VPN you will need to remove these lines from that container
depends_on:
- vpn
And
network_mode: "service:vpn"
Then you will have to add the ports back to the container and remove it from the VPN container at the top (this is the ports on sonarr for exmample).
ports: - 8989:8989
Volumes (very important)
If you plan to change anything related to the paths like mounting your share or where you keep your configs for each application, then you will need to modify the docker-compose file before using. Here is why. When I made this, I used the /opt/docker/mega location for the yml file and all the application folders for config files, db, etc. Also, my network share mount location and name is /media/windowsshare, so if you do differently you will have to modify the docker-compose file. Let’s look at one specific volume for the radar application so you can see what I am talking about:
volumes:
- /opt/docker/mega/radarr:/config
- /media/windowsshare/myshows/movies:/movies #optional
#- /path/to/downloadclient-downloads:/downloads #optional
For the first line you can see that this will place all config related files for Radarr in /opt/docker/mega/radarr. However, if you decided to place it in another location you will have to modify this volume, and any other volumes, with the path you chose. This is completely fine to do, but this will open up more chances for typos or misalignment in the file, which means potentially not working for you.
The second line is the same scenario except for the location of the movies you download. Another important thing here is when you go to configure these applications, some of them will need the location of the root folder. Radarr above is one of those. In the Radarr application you have a place to select the root folder. You cannot type /media/windowsshare/myshows/movies. You will simply look for a folder called movies. In the second line that is what it is telling you. That path will be movies in the application. It will make more sense once you see it in the application.
The final line is commented out (not used), because it is a way to move the folders to a new location as soon as it finishes the download. I always completely seed, so I do not move them. You can remove the number sign and change the path if you like.
Time to run it
If you are still with me, it is time to kick off the docker-compose file and fire up all of your apps containers at once. Make sure you have navigated to the mega folder. You can get there by running this
cd /opt/docker/mega
Now we will run one simple command and it will pull the images and run them.
Sudo docker compose up -d
It will look like this and take a few minutes depending on the speed of your device. 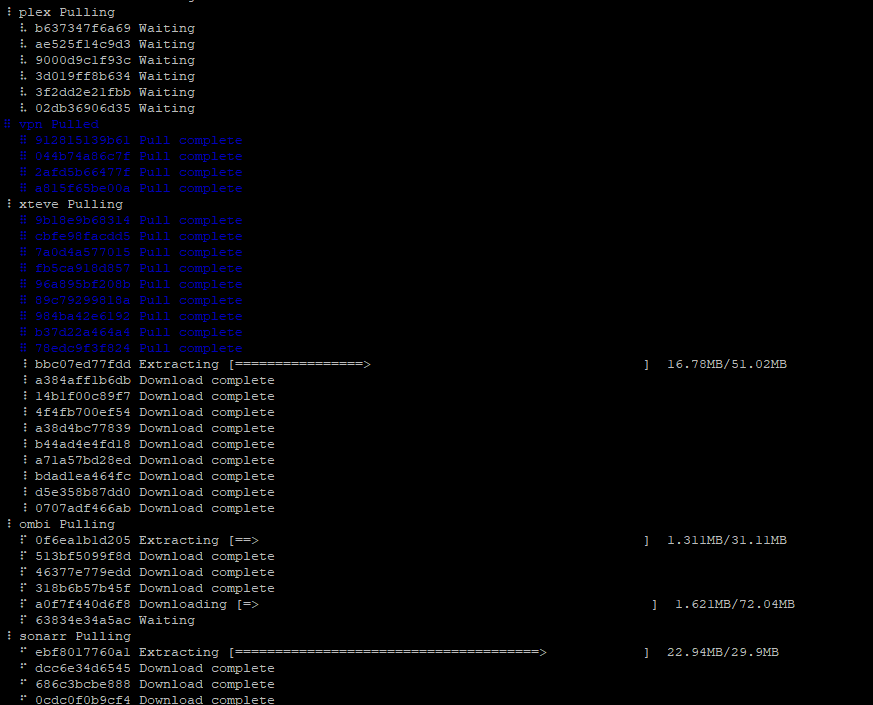
Now to check that the containers are up and running we will run this command
sudo docker ps
And it will look something like this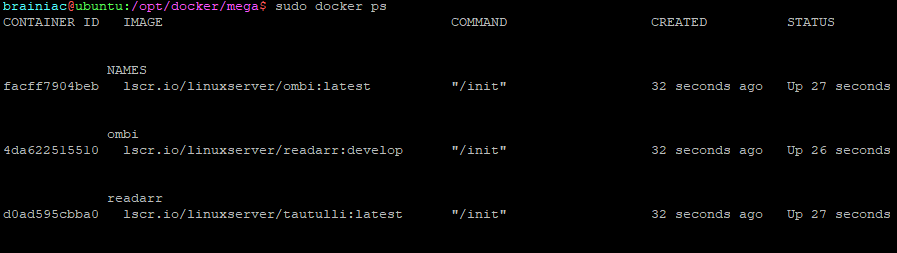
A little about docker commands
The initial command we did pulled the images and set up the containers and ran them. As you manage this system there are a few others that will come in handy.
- See running containers
-
sudo docker ps
-
- See running containers and those not running
-
sudodocker ps -a
-
- Stop container example (This keeps the container without removing it)
-
sudo docker stop radarr
-
- Start a stopped container
-
sudo docker start radarr
-
- Stop all containers without removing them
-
sudo docker stop $(sudo docker container ls -q)
-
- Start all containers again
-
sudo docker compose up -d
-
- Update applications
-
sudo docker compose pull
-
sudo docker compose up -d
-
- Stop all containers and remove them (add -v if you wish to remove the volumes)
-
sudo docker compose down
-
Check that the VPN is working
First let’s see what your home Ip address is by running this command
curl ifconfig.me
Now run this command to see if the VPN is working. You should see a different Ip address. What we are doing is running this from the container, which will show us the Ip address it is using. If it returns the same Ip address, then the vpn is not working. If it is different then we have success.
sudo docker compose exec vpn bash -c "curl ifconfig.me"
You can change the word vpn to radarr or ombi, etc and run it again to see if those are also making use of the vpn.
Let’s check that you can now get to your applications
Here are the ports for each application. You will need the internal Ip address for your device docker is installed on. You should have this earlier from the PuTTY section above. Something like 10.0.0.2. If not, type this in your terminal to get it.
hostname -I
To get to each application you open your browser and type in that Ip address, followed by the port like this and press enter. Your application should open in the browser and be ready for configuring. For Plex and xTeve there are trailing sub-directories.
10.0.0.2:8989
Ombi- 3579
Radarr- 7878
qBittorrent- 8080
Tautulli- 8181
Lidarr- 8686
Readarr- 8787
Sonarr- 8989
Jackett- 9117
Plex- 32400/manage
xTeve- 34400/web
Threadfin- 34401/web
Jellyfin- 8096
Navidrome- 4533
Updating images
You will need to update your images on a regular basis. Follow these steps in this order to do so.
-
-
- Navigate to where your mega directory is. If you followed my example, it will be like this:
cd /opt/docker/mega
- Shut down the containers
sudo docker compose down
- Update your OS. If you are using debian the command to update and upgrade at the same time would be like this:
sudo apt update && apt upgrade -y
- Update all of the images at the same time
sudo docker compose pull
- After that finishes lets start them again
sudo docker compose up -d
- Once they are up and running lets clean up our mess. This command will remove old images and free up that space
sudo docker image prune
- Navigate to where your mega directory is. If you followed my example, it will be like this:
-
Final Thoughts
I had contemplated continuing on with configuring each of these applications, but this article is pretty long already. If there is enough demand, I will make a follow up article on configuring and using these applications all together. They really do make for a great combination of applications. If you have any questions or anything to add, please leave a comment and I will reply as soon as I can. Thanks for reading this tutorial on the all-in-one media docker container and I hope it helps someone.
UPDATE: I have had requests to continue on with the configuration of each of these applications. The next step in this series will be to configure the qBittorrent client. I highly recommend that you follow in the order that I will lay out because it will help minimize having to go back and re-do a section.
Below are the links to each part of the All-in-One Media Docker Container. Next up is qBittorrent.
Find more on https://notposted.com

")
")
No Comments on "All-in-one Media Docker container"